Introduction: Selenium WebDriver is a powerful tool for automating web applications, and ChromeDriver is an essential component that enables Selenium to control the Chrome browser. Keeping ChromeDriver up-to-date is crucial for compatibility and optimal performance.
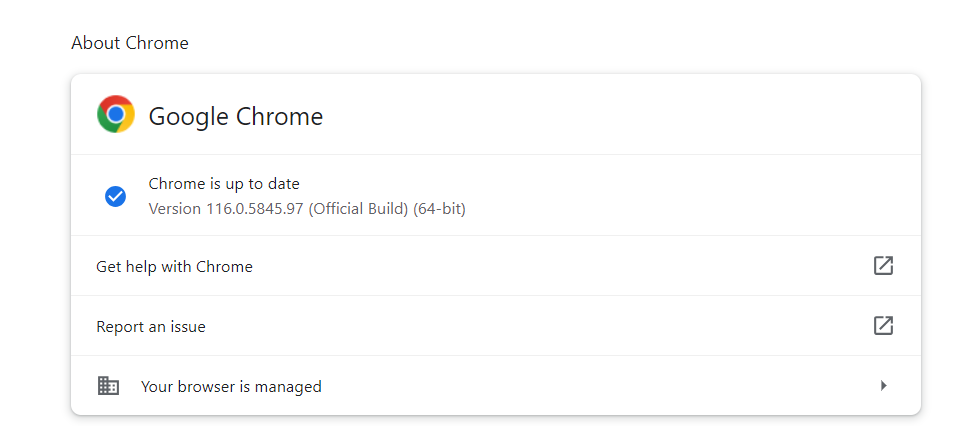
Step 1: Find the Current Chrome Version 1. Open the Google Chrome browser on your machine. 2. Click on the three vertical dots at the top-right corner of the browser window to open the menu. 3. Navigate to Help -> About Google Chrome. 4. A new tab will open, displaying the current version of Google Chrome.

--------------
-------------------------------------------------------------------------------- Step 2: Check the Chrome Driver Version Compatibility 1. Go to the official Selenium website at https://www.selenium.dev/. 2. Navigate to the "Downloads" section. 3. Look for the Chrome Driver version that matches your Chrome browser version. - Ensure that the major version number of Chrome Driver matches the major version number of Google Chrome.
------------------------------------------------------------------------------------------------ Step 3: Download the Latest Chrome Driver 1. Visit the Chrome Driver download page by clicking on the provided link in the Selenium Downloads section.
Check here and download.
https://googlechromelabs.github.io/chrome-for-testing/

Suppose you have 64 bit windwos operating system then under platform column select win 64
copy next to link paste it into browser press enter automatically it will downloaded.Select its path and paste it into your code.
https://edgedl.me.gvt1.com/edgedl/chrome/chrome-for-testing/116.0.5845.96/win64/chromedriver-win64.zip
2. Choose the appropriate version of Chrome Driver based on your operating system. 3. Click on the download link to start downloading the Chrome Driver executable file (`.exe` for Windows, `.zip` for macOS, or Linux). ------------------------------------------------------------------------------------------------ Step 4: Replace the Existing Chrome Driver 1. Locate the previously downloaded Chrome Driver executable file on your machine. 2. If you previously placed the Chrome Driver in a specific folder, navigate to that folder. - In case you don't remember the specific folder, the default location for Windows is often "C:\Program Files\ChromeDriver" or "C:\Program Files (x86)\ChromeDriver". - For macOS, the default location is "/usr/local/bin"
3. Replace the existing Chrome Driver file with the downloaded Chrome Driver executable file.
---------------------------------------------------------------------------------------------------
Step 5: Verify the Updated Chrome Driver
1. Open your Selenium project or script.
2. Set the path to the Chrome Driver by specifying the location of the updated Chrome Driver file.
- Example: For Java, you can use the System.setProperty method:
`System.setProperty("webdriver.chrome.driver", "path/to/chromedriver");`
3. Run your Selenium test or script, and it should now utilize the updated Chrome Driver.
---------------------------------------------------------------------------------------------------
Conclusion:
Updating the Chrome Driver for Selenium is a straightforward process that ensures compatibility and overall performance. By following the step-by-step procedure outlined in this blog, you can easily update your Chrome Driver and continue seamless automation with Selenium.
Comments
Post a Comment